
From Chalk to Checkout: How Meera Turned Her Living-Room Tuition Class Into a Listing on MemuniCity
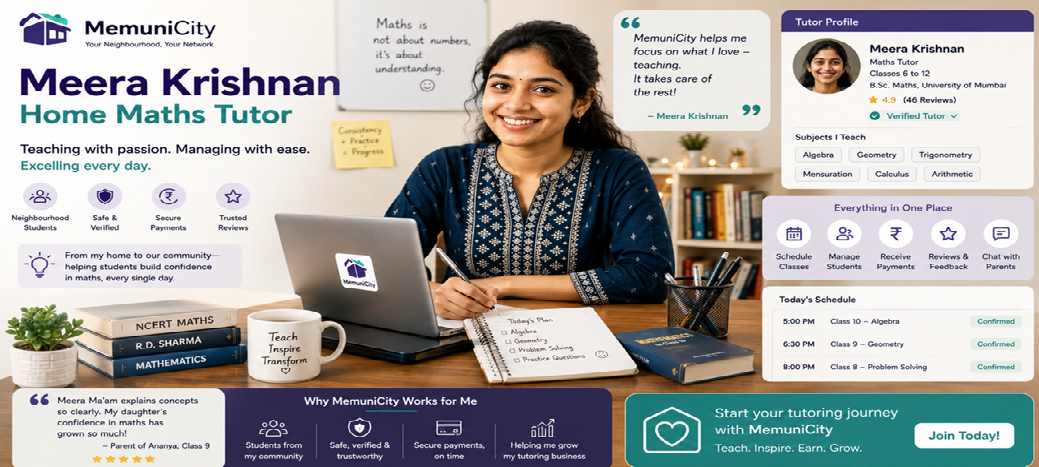
Meera Krishnan has been teaching Maths and Science to Class 6–10 students out of her living room in Cedar Meadows for six years. Word of mouth got her a steady eight students, but every March the same thing happened: two kids graduated out of tuition, and she scrambled to find replacements by pinning a paper notice on the society noticeboard, which the maintenance staff always took down within a week.
Her neighbour Divya, who sells homemade pickles on MemuniCity, mentioned that the app isn't just for food and hand-me-downs — sellers can list services, with proper class schedules, seat limits, and monthly billing. Meera decided to give it a shot. Here's exactly how her afternoon went, screen by screen.
Step 1 — Signing up
Meera opens MemuniCity and taps Sign up. The form asks for just three things:
- Name
- Password (minimum 8 characters)
She could also have used Google sign-in — either way, the account is created instantly and she's logged in. Because she signed up with email/password, MemuniCity emails her a verification link (valid 24 hours) and holds her on a "verify your email" screen until she clicks it. (Had she used Google, this step would already be done for her.) She checks her inbox, clicks the link, and she's in. If the link had expired, there's a Resend verification email button on the same screen — no dead end.
Step 2 — Onboarding: telling MemuniCity where she lives
Next, MemuniCity needs to know which society she belongs to, since almost everything on the platform — reach, distance, "same society" filters — is anchored to it. On the onboarding screen she:
- Taps Find society, which opens a search panel. She picks her city from a locked dropdown (no typing city names freehand — MemuniCity only operates in cities it has activated), then types "Cedar" and her pincode. Cedar Meadows shows up in the results and she taps it.
- Fills in her flat/house number (e.g. "B-1204").
- Ticks the box to accept the General Terms of Use (she has to scroll to the bottom of the terms box before the checkbox even unlocks).
She's now a fully onboarded resident of Cedar Meadows — she can browse the feed, chat, and buy from neighbours already. Selling is the next unlock.
Step 3 — Verifying her phone
Before she can register as a seller, MemuniCity wants a verified phone number too (sellers need to be reachable, and buyers' orders show the seller's number). From her Profile page she adds her mobile number, taps Send OTP — MemuniCity sends the SMS with the OTP and she types the 6-digit code, and her phone shows as verified. (This option only appears once her email is verified — an anti-spam guardrail so the OTP channel, which costs money to send, can't be abused by bots.)
Step 4 — Registering as a seller (the KYC form)
Now the real step: Become a Seller, at /seller/register. MemuniCity currently runs in direct-payment mode — buyers pay tutors like Meera directly (cash or their own UPI), so the platform never touches the money and doesn't need to run a bank-grade KYC on her finances. The form is deliberately light:
- Phone — pre-filled from her profile (read-only here; she'd change it on her profile if it were ever wrong, not on this form).
- Complete address — her full residential address, not just the flat number.
- Aadhaar number + a photo upload of her Aadhaar card image — this is the one identity document MemuniCity always requires, in every mode, so an admin can confirm she's a real, traceable person.
- A checkbox: "My Aadhaar address is different from where I live" — Meera's Aadhaar still shows her parents' address in Mysuru, so she ticks it, which reveals an address-proof image upload (a utility bill, in her case) that becomes required once ticked.
- No PAN number, no PAN image, and no bank account fields — none of these appear on the form at all. Since Meera will be paid directly by parents rather than through a payment gateway, there's simply no payout account for MemuniCity to set up, so it doesn't ask for banking details.
- A checkbox: "I intend to sell food items" — Meera leaves this unticked. It only matters for sellers in the Food/Bakery categories (it would ask for an FSSAI registration number, expiry date, and certificate image) and is completely irrelevant to a tuition listing — MemuniCity just skips that sub-review for her.
- Finally, she ticks acceptance of the Seller Terms (a separate scroll-to-accept document from the general terms, covering how direct payment and disputes work in this mode).
She submits. Her documents are uploaded privately (an admin reviewer will see them via a short-lived link — they're never public), and her seller status flips to Pending. A day later she gets a notification: Approved. Behind the scenes, this simply switches on seller = true for her account — there's no payout account to provision, since she'll be collecting payment herself.
(If a family member had changed her Aadhaar details or replaced her Aadhaar image later, that would automatically re-open her review — approval is only granted once, but identity changes are always re-checked. A phone-number change on her profile would do the same.)
Step 5 — Creating her first listing: Maths & Science tuition
From the Seller Hub, Meera taps Sell Something, and now comes the form that decides how her class actually gets discovered and booked. Every field, in order:
What are you offering?
Two big cards: A product or A service. Tuition is clearly a service — Meera taps that, and the form immediately reshapes itself: the stock/availability section disappears and a schedule & billing section appears instead.
Basics
- Title — she writes "Maths & Science Tuition — Class 6 to 10".
- Description — at least 50 characters (the form won't let her submit less). She writes about her teaching style, the CBSE/ICSE syllabus coverage, homework support, and that she's been teaching for six years — this is also where she mentions timings and age group in more depth than the title allows.
- Category — a dropdown filtered to service categories only, since she picked "Service" above: Tuition Classes, Dance Classes, Music Classes, Yoga Classes, Karate Classes... She picks Tuition Classes.
- Price (₹) — the label dynamically relabels itself based on what she picks in the billing section below (see next). She'll come back to this after setting cadence.
- Condition (new/used) — this field doesn't even appear for her category; it only shows up for resale categories like Toys, Books, and Household.
Schedule & billing (the heart of a service listing)
-
Billing — a dropdown: One-off booking (single charge), Daily (recurring subscription), or Monthly (recurring subscription). Meera picks Monthly, since she charges a flat monthly tuition fee. The Price field above instantly relabels to "Price per month" and she types ₹2,500.
-
Default session length (minutes) — the length of one class, used as the fallback for any slot that doesn't override it. She sets 60.
-
Class slots — this is where she defines her actual batches. Each slot is a day, a start time, a duration, and a seat capacity. She taps + Add a slot three times to create:
- Mon/Wed/Fri, 5:00 PM, 60 min, 8 seats (her Class 8–10 batch)
- Tue/Thu, 4:00 PM, 45 min, 6 seats (her Class 6–7 batch)
- Saturday, 11:00 AM, 90 min, 4 seats (a small doubt-clearing/revision batch)
A booking always reserves exactly one seat in one specific slot — so her three batches run as three independently bookable groups under the same listing, each filling up on its own. The form warns her that slots can't be edited after the listing goes live (an existing slot might already have students booked into it), so she double-checks the timings before moving on.
Reach & fulfilment
- Reach — My society only or Across nearby societies. Meera picks Across nearby societies, since a couple of parents from the neighbouring society have already asked if she teaches remotely.
- Fulfilment (relabelled "Where it happens" for services) — Delivery, Pickup, or Both. She picks the option meaning students come to her — for a service like tuition this describes where the class is conducted rather than a courier choice.
Where it's available
A checkbox, "Available at my home society — Cedar Meadows", ticked by default. Meera leaves it ticked, since she teaches from her own flat. (Had she rented a small classroom in a different society, she'd untick this and use the Find society picker to set that location instead — buyers would then see distance calculated from that classroom, not her home.)
Contact number
Another default-on checkbox: "Use my profile phone number." She leaves it ticked — this is the number parents will see attached to their booking. (Untick it to enter a separate number just for this listing.)
Photos
Up to 4 photos, max 1 MB each. Meera uploads a photo of her tidy study table/whiteboard setup and one of a sample worksheet she prepares for students.
Payment barcode (UPI QR)
Because MemuniCity is running in direct-payment mode, this section does appear on her form — it's how parents will actually pay her. She's already set a default UPI QR code on her profile, so here she just sees a checkbox: "Use my default profile barcode for this listing", ticked by default. If she ever needed a different UPI ID just for this listing (say, a separate account she uses only for tuition income), she'd untick it and upload a listing-specific barcode image (max 1 MB) instead.
She hits Post listing. It's live.
Step 6 — Parents discovering and booking her class
Because her billing is Monthly (a recurring cadence), parents don't see a plain "Add to cart" button on her listing page — they see "Request to subscribe — ₹2,500/month." A parent, Rohit, taps it and optionally picks which slot he wants his daughter in (the Mon/Wed/Fri batch). This creates an enrollment in Requested status — no seat is blocked yet and no money has moved.
Meera gets notified and opens her pending requests for the listing. She sees Rohit's request, checks that his daughter's grade fits the batch, and taps Approve. That reserves the seat in that specific slot (re-checking there's still room) and — since MemuniCity isn't running a payment gateway in this mode — the subscription goes straight to Active. There's no auto-debit mandate to authorize: Rohit and Meera simply settle up directly (cash, or scanning her UPI barcode) each billing cycle. If she'd rather not take this particular student, she can Reject instead — no seat is ever touched.
If Meera doesn't like a request for any reason (bad fit, batch already tight), rejecting is a dead-end for that request — nothing was ever reserved, so nothing needs to be undone.
Step 7 — Managing her batches and subscribers
From the Seller Hub, Meera's listing has a Subscribers page. It's laid out exactly the way she thinks about her class: grouped by slot. Under "Mon/Wed/Fri, 5:00 PM (8 seats)" she sees Rohit's daughter and two others, each row showing the seat-holder's name, flat number, subscription status, monthly amount, how many billing cycles they've been charged for so far, and their date of last payment. The Tue/Thu batch and the Saturday batch each show their own remaining seats. At a glance she knows exactly how full each of her three batches is and who's paying reliably.
Step 8 — Talking to parents
Every listing has a Message button. A parent browsing her listing — before or after subscribing — can tap it to open a chat thread with Meera directly in the app: asking about the syllabus, requesting a trial class, or flagging that their child will be away next week. She replies from the same Chats section MemuniCity gives every user. Key milestones (a new subscription request, an approval, a rejection) also generate their own automatic notifications, so nothing gets missed even if she forgets to check messages that day.
Step 9 — Getting paid, and tracking it
Once Rohit's subscription is Active, MemuniCity raises a fresh order for each billing cycle — the start of every month, in his case. Because MemuniCity doesn't handle any money in this mode, that order sits as placed but unpaid until Meera actually collects the fee from Rohit herself (cash in hand, or he scans her UPI barcode). Once she's been paid, she opens the order and taps Mark as paid — this is the one manual step she has to remember every cycle, for every student.
Her Seller Hub / Dashboard is where she keeps track of all of this:
- "To be paid" — instead of an auto-settled earnings figure, her dashboard shows a running tally of what's owed to her: orders that have been placed for the cycle but not yet marked paid. It's her reminder list as much as a running total.
- Sales over the last 1 / 3 / 6 / 12 months — so she can see her tuition income trending as her batches fill up, once she's marked each cycle paid.
- A reminder that her first five sales are free — after that, a subscription plan is required to keep selling, shown right alongside her tier options.
If a parent cancels, the seat frees up automatically and no further cycle orders are raised for them — Meera doesn't need to do anything to "close out" a cancelled student beyond that.
Step 10 — Reviews
After a cycle completes, parents who've paid and had at least one session can leave Meera a review from their Orders page — a rating and a note tied to that specific booking. A glowing review from Rohit ("My daughter's grades in Maths went up in a month!") becomes visible on Meera's listing for the next parent scrolling past it.
Step 11 — Getting the word out: sharing her listing
With her batches now live and one paying student locked in, Meera's next problem is the same one she started with — filling the remaining seats. This is where MemuniCity's built-in share row on the listing page comes in. Right on /listing/{her-listing-id} — a page that's viewable even by people who aren't signed in yet, so she can send it to absolutely anyone — there are one-tap share buttons for:
- WhatsApp — the obvious one. She shares it straight into Cedar Meadows' resident WhatsApp group and a couple of neighbouring-society parent groups she's part of.
- Facebook, Instagram, X (Twitter), and Telegram — for the parents she knows who are more active on those.
- Copy link & caption — a one-tap button that builds a ready-made caption (her title, a snippet of her description, the price, and the listing's first photo) plus the URL, all copied together so she can paste it anywhere without composing a post from scratch.
Because the listing page works for signed-out visitors too, a parent who's never used MemuniCity before can click the shared link, see everything about her tuition batches, and get a clean "Sign in to buy" prompt only when they're ready to actually request a seat — no forced signup just to look around.
Within two weeks, all three of Meera's batches are full, and for the first time in six years she has a waitlist instead of an empty seat in March.
The whole journey, in one line
Sign up → verify email → onboard with society & flat → verify phone → submit a light seller KYC (Aadhaar + address proof if needed, no PAN or bank details, skip FSSAI) → get admin-approved → post a Service listing with a category, description, monthly billing, three seat-capped slots, and a UPI barcode for payment → approve subscription requests as they come in → chat with parents → collect each cycle's fee directly and mark it paid → watch batches fill on the Subscribers page → collect reviews → and share the listing link everywhere a neighbour might be scrolling.
For a home tutor like Meera, that's the difference between a paper notice torn down by the maintenance staff, and a waitlist.
Comments
Sign in to comment.
No comments yet.